Azure is a great platform to build applications on, and it allows you to scale up very high without a huge investment in infrastructure. However, what if you want to use Azure to scale down very low? What do you do if you want to run 20 different small websites, but you don't want to pay $1,200 a month for 40 extra-small web roles (2 per site to ensure availability)?
If that describes what you'd like to do, take a look at the Windows Azure Acclerator for Web Roles (WAAWR). It makes it easy to set up a single Azure web role that can host multiple IIS sites on it - 20, if you want, or more. You can set up 2 extra small instances of the accelerator role and only be out $60 a month for the instances. The initial deployment of the Accelerator takes several minutes, as is typical for Azure web role deployments, but deployment of each individual application is done even quicker and using the publishing tools built into Visual Studio. To see a demo of the WAAWR, watch Cloud Cover Show episode 51.
It's a great tool, go check it out - I won't rehash what's already out there about it. Instead, I'm going to focus specifically on how to use Node.js with the WAAWR.
Node.Js
A short while ago, Ryan Cromwell, a coworker of mine, asked if Node could be run with the WAAWR. It seemed like it should, as WAAWR was just setting up IIS sites in Azure automatically, and Node could run in IIS alongside .Net apps, but I wanted to try it out for myself to be sure - and it worked without any problems. The following are the steps to take to get Node working with the Windows Azure Accelerator for Web Roles.
Azure and WAAWR Development Setup
1. Be sure that your development machine is ready for Azure development - I recommend using the Web Platform Installer. And if you aren't familiar with Azure development, download the Azure Training Kit.
2. Setup an Azure account and be sure you can deploy a simple hello world app. Here are some steps to get you started. You can use the free trial if you don't have an account yet.
3. Download and install the WAAWR. The downloads are on GitHub, and so is the documentation. Work your way through the documentation and deploy WAAWR to Azure. Be sure you can create a simple Hello World web application in .Net and deploy it to Azure using the WAAWR. Make note of the RDP username/password you set up - you'll need it later.
Node on Azure Setup
4. Download and install the Azure SDK for Node.js.
Customizing the Azure Project
5. In step 3, you should have created a visual studio project for the Azure Accelerator for Web Roles. Open that project -we're going to customize it.
6. In the Cloud project, open the ServiceDefinition.csdef file and look in the Startup element for a startup task - you should already have one that calls ConfigureIIS.cmd. Add an extra line so that the startup section looks like this:
<Startup>
<Task commandLine="Startup\ConfigureIIS.cmd" executionContext="elevated" taskType="simple" />
<Task commandLine="Startup\setup_web.cmd" executionContext="elevated" taskType="simple" />
</Startup>
7. In your Web project that was created as part of step 3, you should have a Startup Folder. Here is what it should look like:

Right-click on the Startup folder, then click Add - Existing Item. Navigate to C:\Program Files (x86)\Microsoft SDKs\Windows Azure\Nodejs\Nov2011\PowerShell\Scaffolding\Node\WebRole\bin. Select all 4 files (iisnode.msi, node.exe, setup_web.cmd, and vcredist_x64.exe) and click Add to add them to the Startup folder. Now your startup folder should look like this:

Right-click on each of these four new files (iisnode.msi, node.exe, setup_web.cmd, and vcredist_x64.exe) and click properties. Then be sure that 'Build Action' is set to 'Content' and 'Copy to Output Directory' is set to 'Copy Always.'
8. Edit the setup_web.cmd and remove this part of it:
echo Copying web.cloud.config to web.config...
copy /y ..\Web.cloud.config ..\Web.config
if %ERRORLEVEL% neq 0 goto error
echo OK
Creating a Node.js site in WAAWR
9. Log into your WAAWR site in the cloud (you should have set this up in step 3) by pointing your web browser to [yoursite].cloudapp.net. It should look something like this after you log in:
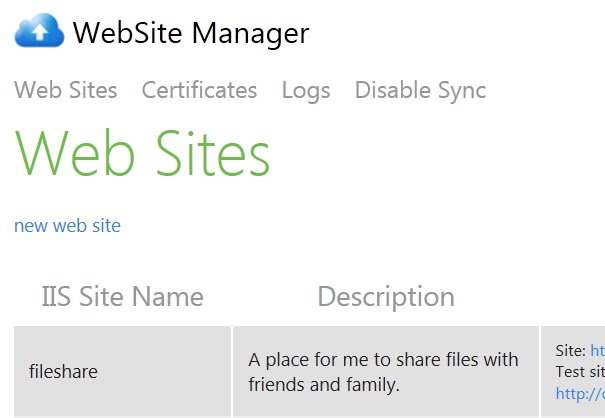
10. Click 'new web site' to create a new web site. This will be for your Node.js website. Make note of the 'IIS Site Name' that you choose - you'll need it in a minute.
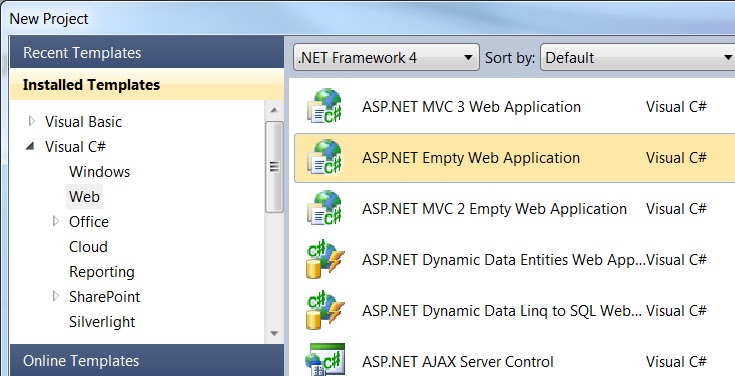
11. Next, go back to Visual Studio, right-click on your solution and Add a New Project to the solution. We'll be adding an 'ASP.Net Empty Web Application':
12. Right-click on your new, empty project, and delete the existing web.config file. We don't need it. You can also get rid of everything under references. We want a very empty site.
13. Right-click on your new project, Add - Existing Item, browse to C:\Program Files (x86)\Microsoft SDKs\Windows Azure\Nodejs\Nov2011\PowerShell\Scaffolding\Node\WebRole, and Add server.js and web.cloud.config to your project. Do not add the bin folder or web.config.
14. Rename web.cloud.config to web.config. (you can use the original web.config later and set up some web.config transformations to allow for development / cloud use, but I'm ignoring that for now).
Deploying your Node.js site from Visual Studio to Azure using WAAWR
15. Right-click on your Node project (the one you created in step 11) and click 'Publish.' You can then use Web Deploy to push your project to Azure through the Accelerator. Here is what mine looks like - the 'Site/Application' name comes from the site you created in Step 10, and the the username/password are the username/password you set up for RDP access for your Web Role in step 3.

16. After publishing, go back to the Accelerator management screen at http://[yoursite].cloudapp.net and log in. You can then test your site out by clicking on the 'Test site' link for your site.
17. When you're ready, you can later set up DNS for a proper domain name and give it a CName record that points to [yoursite].cloudapp.net, and once the DNS propogates (it could take a couple of days), you'll then be able to access your Node site from a proper URL.
12. Right-click on your new, empty project, and delete the existing web.config file. We don't need it. You can also get rid of everything under references. We want a very empty site.
13. Right-click on your new project, Add - Existing Item, browse to C:\Program Files (x86)\Microsoft SDKs\Windows Azure\Nodejs\Nov2011\PowerShell\Scaffolding\Node\WebRole, and Add server.js and web.cloud.config to your project. Do not add the bin folder or web.config.
14. Rename web.cloud.config to web.config. (you can use the original web.config later and set up some web.config transformations to allow for development / cloud use, but I'm ignoring that for now).
Deploying your Node.js site from Visual Studio to Azure using WAAWR
15. Right-click on your Node project (the one you created in step 11) and click 'Publish.' You can then use Web Deploy to push your project to Azure through the Accelerator. Here is what mine looks like - the 'Site/Application' name comes from the site you created in Step 10, and the the username/password are the username/password you set up for RDP access for your Web Role in step 3.
16. After publishing, go back to the Accelerator management screen at http://[yoursite].cloudapp.net and log in. You can then test your site out by clicking on the 'Test site' link for your site.
17. When you're ready, you can later set up DNS for a proper domain name and give it a CName record that points to [yoursite].cloudapp.net, and once the DNS propogates (it could take a couple of days), you'll then be able to access your Node site from a proper URL.
That's it! Now you can publish Node apps to Azure in combination with the Windows Azure Accelerator for Web Roles. I would recommend looking closer at the Azure Node SDK, as it includes libraries for connecting to Azure Storage (such as Table Storage). You should also delve deeper into Node, and here are some more Node.js resources.
3 comments:
Really interesting post, I'd really like some info about how this works with a development/test environment in the emulator. Is it possible to get it set up to use the emulator with Visual Studio F5? If it is, it would be great to see a post on how to do that.
Lindesay, excellent question. The short answer is that you can run your Node.js app in Visual Studio without the compute emulator by creating some web.config transforms (However, you will need the Storage emulator running locally if you want to use the development version of Azure tables / blobs / queues). You can hit F5 to run your app locally, then change to a Release configuration and deploy to Azure via WAAWR using WebDeploy in Visual Studio. I'm now writing up a blog post describing how to set up your project in Visual Studio to allow for this. Keep your eyes on this blog!
The Azure Websites is a fantastic system but it has a one big obvious issue, creating it inappropriate for the development usage.
Post a Comment